Dropbear 2026.91⚓︎
- Homepage: https://matt.ucc.asn.au/dropbear/dropbear.html
- Manpage: https://linux.die.net/man/8/dropbear
- Changelog: https://matt.ucc.asn.au/dropbear/CHANGES
- Repository: https://github.com/mkj/dropbear
- Package: master/make/pkgs/dropbear/
- Steward: @fda77
"Dropbear is a relatively small SSH 2 server and client. [... ...]
Dropbear is particularly useful for "embedded"-type Linux (or other
Unix) systems, such as wireless routers."
http://matt.ucc.asn.au/dropbear/dropbear.html
Dropbear is an SSH server and client plus SCP. There are two packages:
the Dropbear server, client, and scp package, and a package limited to
the Dropbear server. Dropbear has been modified so that only root logins
are allowed.
Basic Terms⚓︎
- SSH (Secure Shell): enables a connection between two computers,
as a secure alternative to telnet, for example. An SSH client (for
example PuTTY, OpenSSH, Dropbear) establishes an encrypted
connection to an SSH server (for example OpenSSH, Dropbear) after
successful authentication.
The how-tos mainly refer to two SSH clients: - SCP (Secure Copy): enables encrypted transfer of files between
two computers. An SCP client (for example PSCP, OpenSSH, Dropbear)
establishes an encrypted connection to an SCP server (for example
OpenSSH, Dropbear) via SSH. -
Password-based Authentication: the SSH connection is established
after the SSH client authenticates itself with a password. -
Public Key Authentication: the SSH connection is established
after the SSH client authenticates itself with a private key (secret
key) against a public key stored on the SSH server. One advantage
is that no password has to be entered at login. -
Host-based Authentication: SSH also defines optional host-based
authentication. However, it is rarely used and is not supported by
Dropbear.
Web Config⚓︎
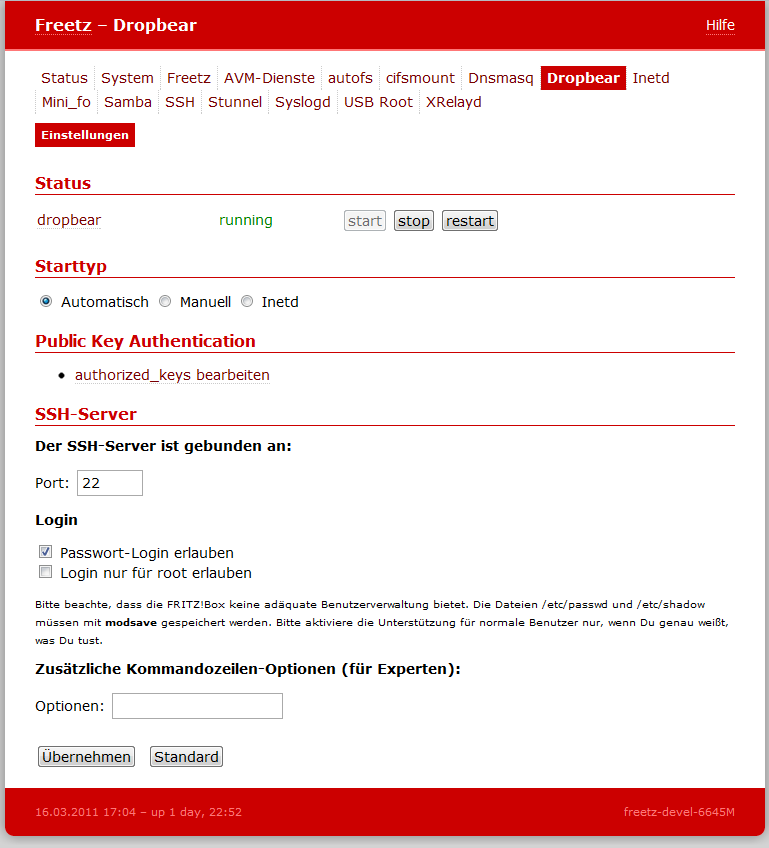
- Start type: either at system startup (automatic) or manual.
-
Authorized keys: list of known public keys for public key
authentication. In syntax and function, this corresponds exactly to
the~/.ssh/authorized_keysfile in a normal Unix installation.
Further details are described
here. The format of the
Authorized keys in the web GUI should look like this for root,
abbreviated here with ...:
- SSH server port (default: 22): changing the default port means SSH
clients must explicitly specify the port. - Password login: enables or disables password-based
authentication. It should be disabled when public key authentication
is used. - Additional command-line options: Dropbear is started with specific
options. An overview of options is available withdropbear -?.
SSH Access with Password (Password-based Authentication)⚓︎
This is the default setting in Dropbear. Without additional settings, the
FritzBox can be reached via SSH as follows:
Access with OpenSSH⚓︎
Access with PuTTY⚓︎
- Set the options:
Session/HostName:fritz.box
Session/Port: 22, or the setting under Packages -> Dropbear
Session/Protocol: SSH
Connection/Data/Auto-login username: root - Save settings (optional):
under Session -> Saved Sessions, enter any name, for example
fritzbox ssh, and press Save. From now on, the connection can be
established by double-clicking the name, or the settings can be
loaded with Load. - Open
root@fritz.box's password: fritzbox
Important: In the newer freetz packages, the default root password is
no longer fritzbox, but freetz, and must be changed after the first login.
SSH Access Without Password (Public Key Authentication)⚓︎
Access with OpenSSH⚓︎
- Run
ssh-keygen, confirming all prompts with Enter. - Run
cat ~/.ssh/id_rsa.pub. - Copy the output of
cat.
Caution: depending on the command line used, line breaks can be
copied as well. They should be removed with the help of an editor
(copy key into editor, remove line breaks, copy key again). - Open the Freetz web interface and switch to Settings -> Authorized
keys. - Insert the previously copied key and click Apply.
- The server-side settings are now complete. There are now two ways to
log in:- [Access from the same PC and user under which
ssh-keygenwas
run]
ssh root@fritz.box - [Access from another PC or user than the one under which
ssh-keygenwas run]
Ifssh-keygenwas run as user1@pc1, but access to the
FritzBox via SSH is now desired as user2@pc2, the problem is
that Dropbear cannot know user2@pc2. Therefore user2 needs an
identity file, whichssh-keygenstores by default in user1's
home directory as~/.ssh/id_rsa, and this must be made
accessible to user2.id_rsacan then be renamed as desired.
Login to the FritzBox via SSH can then be done with
ssh -i PathToIdentityFile root@fritz.box, for example
ssh -i id_rsa root@fritz.box.
If it should be just as simple as for user1@pc1, simply use
ssh-keygen for each constellation (user1@pc2, user2@pc1, ...)
to create new key pairs. The public keys from them, usually
id_rsa.pub, must then be entered in Freetz again. Each key goes
on its own line. In practice, an almost unlimited number of keys
can be listed.
- [Access from the same PC and user under which
Access with PuTTY⚓︎
- Start
puttygen. - Key/Generate Key Pair
- Move the mouse over the empty area.
- Copy the complete key from the Public Key for pasting into ... box.
- Save Private Key, skip the warning, and save it in any directory
with any name. - Open the Freetz web interface and switch to Settings -> Authorized
keys. - Insert the previously copied key and click Apply.
- Start
putty. - Set the options:
Session/Host Name: fritz.box
Session/Port: 22, or the setting under Packages, Dropbear
Session/Protocol: SSH
Connection/Data/Auto-login username: root
Connection/SSH/Auth/Private key file for authentication: path to the
previously saved private key - Save settings (optional):
under Session -> Saved Sessions, enter any name, for example
fritzbox ssh, and press Save. From now on, the connection can be
established by double-clicking the name, or the settings can be
loaded with Load. - Open
Access to the FritzBox from Outside⚓︎
To reach the SSH port from outside, "only" a port forward has to be set
up. Unfortunately, the AVM web interface now forbids forwarding to the
box itself. However, there is a CGI package named AVM-Firewall that does
not have these restrictions:
- Install the CGI/AVM-Firewall package as well.
- In the AVM-Firewall menu item in the Freetz web interface, select
the "Port Forwarding" view. - Conveniently, what we want is already preset: tcp 0.0.0.0:22
0.0.0.0:22, meaning a forwarding from port 22 to port 22. - Click the Add button and then Apply.
- Restart dsld, found under AVM services.
It can make sense to let Dropbear listen on other ports, for example to
get out of restrictive networks. Ports 80 (HTTP) and 443 (HTTPS) are
suitable because they are usually the most necessary. If those are also
closed, port 53 (DNS) is still worth a try. Additional rules for other
ports can be added alternatively or in addition to the rule above. Enter
the desired port in the upper field, somewhat unfortunately labeled
"(Start-)Port".
Access to the FritzBox Web Interface or Other Services in the Home Network from Outside, for Example Behind a Proxy⚓︎
Attention: tunneling through proxies in company networks can, among
other things, lead to a warning or even termination. Corresponding works
agreements or contractual components must absolutely be observed.
Following these tips is at your own risk!
Anyone who needs access to the Freetz interface (Freetz GUI) or the AVM
interface (AVM GUI) while on the road can also use PuTTY for this; other
SSH tools work analogously.
In PuTTY, enter the proxy under Proxy. Under Tunnels, enter the following
for the Freetz GUI:
Source Port: 1081 {any free local port}
Destination: 192.168.178.1:81 {the IP of the box in the LAN)
After adding it, this appears in the PuTTY window under "Forwarded
Ports":
The same can be configured for the AVM GUI (port 80):
Source Port: 1080 {any free local port}
Destination: 192.168.178.1:80 {the IP of the box in the LAN)
After starting the SSH session and logging in, call the Freetz GUI like
this:
... and the AVM GUI like this:
Note:
For access to the AVM GUI (port 80) to work, the Referer must be
suppressed. In Firefox, set the value for
network.http.sendRefererHeader
to 0 (zero) under about:config. To what extent this is also necessary for
the Freetz GUI (port 81) would need to be tested more thoroughly. Anyone
who does not need the Referer should disable it as described above.
Forwarding to arbitrary machines and services in the LAN can also be
configured. For example, a remote desktop connection for a machine in the
LAN:
Source Port: 3399 {any free local port}
Destination: 192.168.178.21:3389 (the IP of the desired machine in the LAN; static DHCP leases are advantageous here)
Then in the remote desktop client:
The "Dynamic" tunnel option is even more fun: only the local, freely
selectable source port, for example 8888, must be specified. As long as
the SSH session is open, a SOCKS proxy is available on the specified
port. If the browser or other programs are configured with this proxy
(localhost:8888 in this example), all network traffic can be pushed
through the tunnel. Due to the low upstream of typical DSL connections,
this becomes somewhat slow, but it routes network traffic securely out of
an insecure network such as a public WLAN.
Access to Other Computers with the FritzBox⚓︎
Note: In the following description, the host key required for the
server is also used as the user key for the root user. It would be more
usual to create a separate user key for this.
On first system startup, Freetz automatically creates an RSA and DSS
private key for the FritzBox. They are located in /var/mod/etc/ssh/ as
dss_host_key and rsa_host_key (as symlinks to /tmp/flash). To be
able to access another computer via public key authentication, the public
key is first required. It can be output to the terminal with, for example,
# dropbearkey -f /tmp/flash/rsa_host_key -y for the RSA key. Then copy
it into the authorized_keys file of the other computer, as usual with
SSH.
The following command copies the RSA key to the remote system with IP
192.168.178.2 for user user01 into the file ~/.ssh/authorized_keys:
# dropbearkey -f /tmp/flash/rsa_host_key -y | ssh user01@192.168.178.2 'umask 077; cat >> .ssh/authorized_keys'
For login without entering a password, the key file must be specified as
a parameter as in the example.
This then provides a passwordless login to 'machine' if the public key
was copied there beforehand.
Possible Use of ssh⚓︎
- Execute a script stored on the FritzBox:
ssh root@fritz.box [command]or
ssh -i identityfile root@fritz.box [command], for example
ssh root@fritz.box '/var/tmp/flash/testscript.sh'to execute
/var/tmp/flash/testscript.sh.
Possible Problems⚓︎
- If the connection breaks after entering the correct password on
models with 4 MB flash memory and telnet login also fails, it is
likely that the kernel was built without pty devices. Enabling the
Replace Kernel menu item helps here. Tested with FBF 5140 FW
43.04.67-freetz-1.1.3. - The following error message after logging in with
ssh root@fritz.box:
Permission denied (publickey).
If you want to log in with a password, password-based authentication
must be enabled. This can be configured under the menu item Packages
-> Dropbear under Password Login, Enabled. - The following warning after logging in with
ssh root@fritz.box: [br]
The authenticity of host 'fritz.box (<your FritzBox IP>)'
    can't be established.
[[BR?]
RSA key fingerprint is XX:XX:...:XX:XX.
Are you sure you want to continue connecting (yes/no)?
Simply confirm with yes. This is asked exactly when connecting to
the FritzBox for the first time with the user, or when the host is not
known in ~/.ssh/known_hosts. -
The following warning after logging in with ssh root@...:
@@@@@@@@@@@@@@@@@@@@@@@@@@@@@@@@@@@@@@@@@@@@@@@@@@@@
@    WARNING: REMOTE HOST IDENTIFICATION HAS CHANGED!     @
@@@@@@@@@@@@@@@@@@@@@@@@@@@@@@@@@@@@@@@@@@@@@@@@@@@@
IT IS POSSIBLE THAT SOMEONE IS DOING SOMETHING NASTY!
Someone could be eavesdropping on you right now (man-in-the-middle attack)!
It is also possible that the RSA host key has just been changed.
The fingerprint for the RSA key sent by the remote host is XX:XX:...:XX:XX.
Please contact your system administrator.
Add correct host key in ~/.ssh/known_hosts to get rid of this message.
...
Simply delete ~/.ssh/known_hosts; it will be created automatically
again. Alternatively, open ~/.ssh/known_hosts and delete the
corresponding line where fritz.box is mentioned. On the next
connection attempt, the warning mentioned above about uncertainty over
the authenticity of the host appears; simply confirm with yes.
Speeding Up Connection Establishment⚓︎
If establishing a connection to Dropbear is not fast enough, here are a
few tips. On my FritzBox 7050, it has recently taken 5 to 6 seconds; the
main cause, according to some entries on the Dropbear mailing list, seems
to be the expensive calculations during key exchange.
- If OpenSSH is used as the client, there is the option of using an
existing connection for further access (ssh, scp): see the options
ControlMaster, ControlPath, ControlPersist;
http://www.debian-administration.org/articles/290
/etc/profilereads the file/etc/init.d/rc.conf, which takes quite
a long time. As an alternative, its cache version/var/env.cache,
created inrc.mod, can be read.
With these two measures, I now connect to my FritzBox in fractions of a
second, from the second through the nth time.