Freetz for Beginners⚓︎
This page is a practical quick-start for first-time Freetz users. It
keeps the older detailed walkthrough because it still documents the
typical first-image workflow, recovery preparation, VirtualBox/PuTTY
usage, and the first flash process.
What Is Freetz?⚓︎
Freetz is a build environment that lets you create a customized firmware
image based on vendor firmware. You can add, remove, and adjust features
for your own device. A short description and historical overview can be
found in the Freetz overview.
What Do I Need to Create a Freetz Image?⚓︎
- The newest recovery image (
.exe) for your exact box. It is very
important to have an up-to-date recovery image
ready before you start. After a failed update you may not have internet
access to download one. Older examples include the
7170 and
7270
recovery directories. - A native Linux operating system, for example Ubuntu,
or, for Windows users, VirtualBox
with a Freetz-Linux virtual machine. - An SSH client such as
PuTTY, which can
be used to connect to Freetz-Linux by SSH or Telnet. - A backup of the current router settings.
- Enough disk space and stable internet access for source downloads.
What Should I Take Into Consideration?⚓︎
Remember that your box is primarily a router and telephone system. When
you modify the firmware, the main functions of the box can be affected.
Normally this should not happen, but a bad combination of packages and
patches may cause stalls or unexpected reboots.
For a first build, use this rule: if you cannot describe a package in
more than two sentences, it should not be on your box yet. Be careful
with patches. You do not need all of them, and not every combination is
useful.
Avoid replace kernel, large low-level changes, and custom modules as a
beginner. Not everything that sounds interesting is a good first step.
Historically, many beginner problems were also caused by packages using
OpenSSL libraries because AVM and Freetz used incompatible library
versions. For a first build, avoid SSL options in packages such as
vsftp, dropbear, or curl; if a package requires SSL, such as
OpenVPN or stunnel, leave it for a later build. Once you have more
experience, you can use OpenSSL by linking it statically into binaries or
by using more advanced solutions.
What Should My First Freetz Image Do?⚓︎
Ask yourself what you want to achieve with Freetz, or which function your
box lacks that Freetz can add. Freetz itself is not a single
modification, but a development environment for modular firmware changes.
The package list reflects common user needs. You can build custom
firmware from existing packages, add your own packages, or omit unneeded
ones. This lets you decide, within the limits of your router's flash and
RAM, which functions your FRITZ!Box will have.
Before selecting packages, review the available packages and addons and
start with only the ones you can verify.
Why Should I Start With a Minimal Image?⚓︎
A minimal image helps you learn how Freetz works and what the menu looks
like after the first flash. It also makes troubleshooting much easier.
Support requests for Freetz and its packages are much easier to answer
after you have successfully uploaded a minimal image to your box.
Use this first-time mindset:
- Start from a minimal, reproducible setup.
- Enable only features you can explain and verify.
- Change one thing at a time and keep notes.
- Keep recovery files ready before flashing.
- Prefer stable package combinations first, then expand.
Do I Need to Adjust My Computer Before Building an Image?⚓︎
Use a Linux build environment, either native or virtualized. For a
prepared virtual-machine workflow, see Freetz Linux.
How Do I Create My First Minimal Image?⚓︎
Even if you already plan to add more packages later, start with a minimal
image. Check these points first:
- Which model do I have, for example 7141 or 7270?
- How much RAM does my model have, for example 16, 32, or 64 MB?
- How large is the flash memory inside my box, for example 4, 8, or 16 MB?
- Do I have a working LAN cable? If flashing fails, recovery is possible
only via LAN cable, not WLAN. - Do I have a backup of my current settings? In the AVM web interface,
use Settings -> System -> Backup settings. - Do I have the correct recovery image? On the
AVM FTP server, select the box, then
x_misc, then the relevant language directory, and download the
matching recovery.exe. You need Windows to run it. - Do I know how to run the recovery file? If not, AVM's recovery FAQ or
the offline Router-FAQ PDF may help. - Is my Linux environment configured correctly with all packages needed
by Freetz? - Is my current firmware supported by Freetz?
The original beginner tutorial is written for users modifying a FRITZ!Box
with Freetz for the first time. The instructions are provided without any
guarantee of correctness and without responsibility for damage to your
device. Freetz can expand the functional range of an AVM FRITZ!Box. It is
based on Linux and can be used on a Linux machine or in a virtual machine.
Freetz creates a new firmware image that can be uploaded through the
official AVM interface.
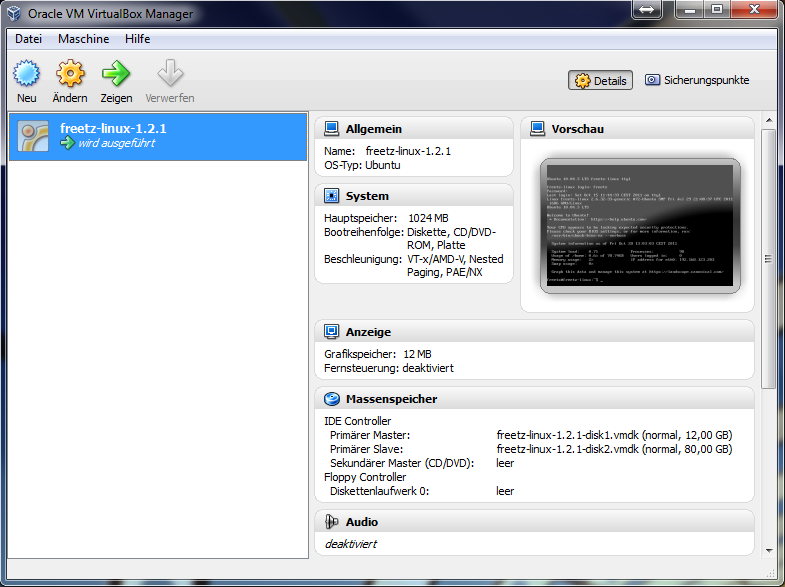
Starting Freetz-Linux⚓︎
Start VirtualBox and select the matching virtual-machine image.
Freetz-Linux will start. Log in with freetz as both username and
password, pressing Enter after each value.
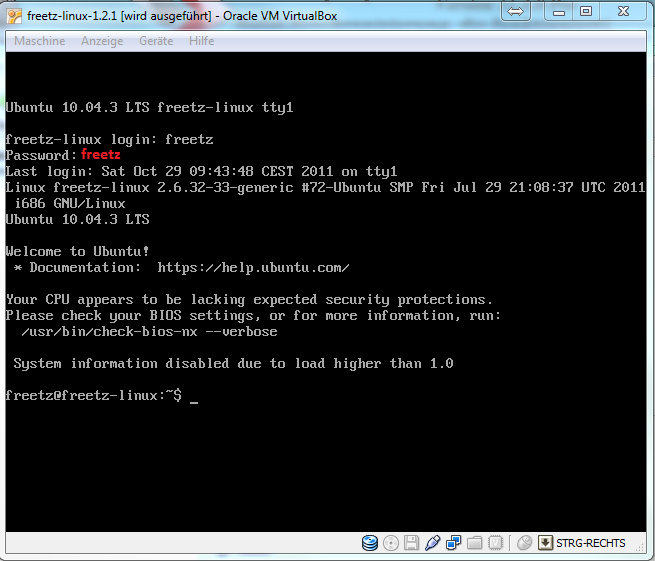
Next, find the IP address assigned to Freetz-Linux, because you need it
for PuTTY access. Run ifconfig. The output should look similar to this:
eth0      Link encap:Ethernet  HWaddr 00:11:22:33:44:55
          inet addr:192.168.178.30  Bcast:192.168.178.255  Mask:255.255.255.0
          UP BROADCAST NOTRAILERS RUNNING MULTICAST  MTU:1500  Metric:1
          RX packets:0 errors:0 dropped:0 overruns:0 frame:0
          TX packets:0 errors:0 dropped:0 overruns:0 carrier:0
          collisions:0 txqueuelen:1000
          RX bytes:0 (0 Mb)  TX bytes:0 (0 Mb)
In this example, the virtual machine's IP address is 192.168.178.30.
Your address can differ depending on your network. If no IP address is
shown, check your computer or virtual-machine network settings and try
again.
Important: in VirtualBox you can switch between the VM and Windows by
pressing Right Ctrl.
Starting PuTTY⚓︎
Start PuTTY.EXE on the Windows computer. Enter the IP address of the
Freetz-Linux VM and confirm with Open.
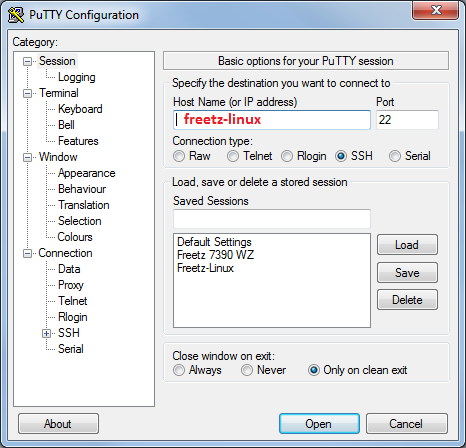

The PuTTY login is freetz with password freetz. The password is not
shown while you type it. After connecting to the Freetz VM, update it
with these commands:
sudo apt-get update(update package lists)sudo apt-get upgrade -d(download updates)sudo apt-get upgrade -y(install updates)
Confirm each command with the administrator password freetz. If a
specific update asks a question, activate the recommended packages and
confirm with OK.
The historical tutorial used this placeholder for checking out a stable
Freetz release from Subversion:
This downloads the selected stable Freetz source code from the Subversion
repository. Check the tags directory to see whether a newer version has
been released. After the download has finished, you should see a message
such as Checked out revision xxxx. Review the FIRMWARES file for
supported firmware versions because release versions can be outdated.
Then change into the Freetz directory, for example with cd freetz-stable,
and run make menuconfig.
For current Freetz-NG builds, use the Git-based checkout instructions
from the project documentation instead of the old Subversion placeholder.
Settings in menuconfig⚓︎
After entering make menuconfig, you should see the following screen:
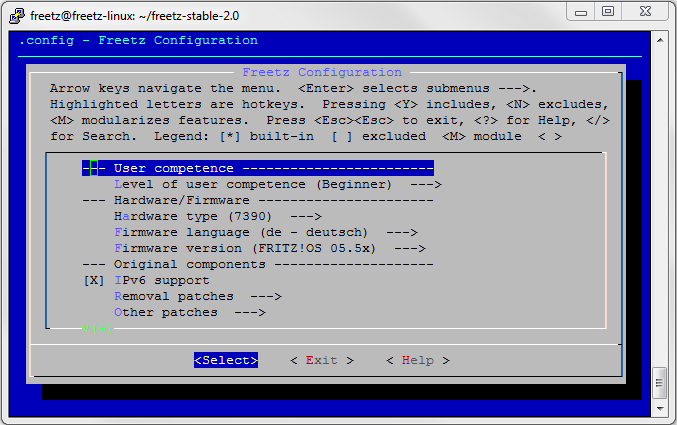
This is the Freetz configuration interface where you select your router.
The original tutorial selected a 7270-V3. After selecting the router
type, exit menuconfig, confirm the question with Yes, then run
make. You should see this:
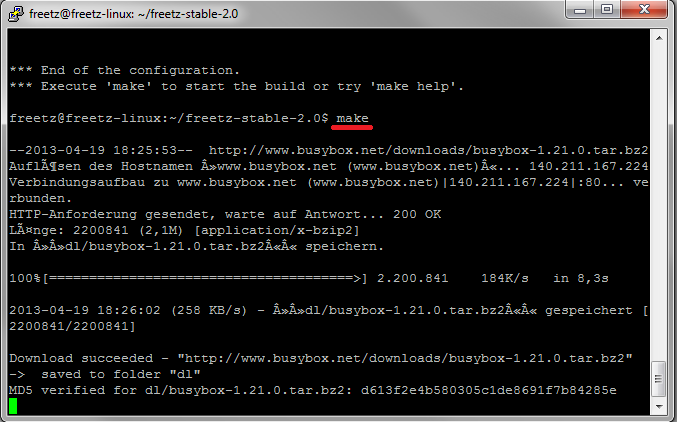
The build process starts. The first build can take a long time depending
on your computer and internet connection because all initial packages
need to be downloaded. Later builds are much faster if you make only
small modifications. The process may print many warnings, but at the end
it should report that an image was created. The image is placed in the
images subdirectory of your Freetz directory. The final message looks
like this:
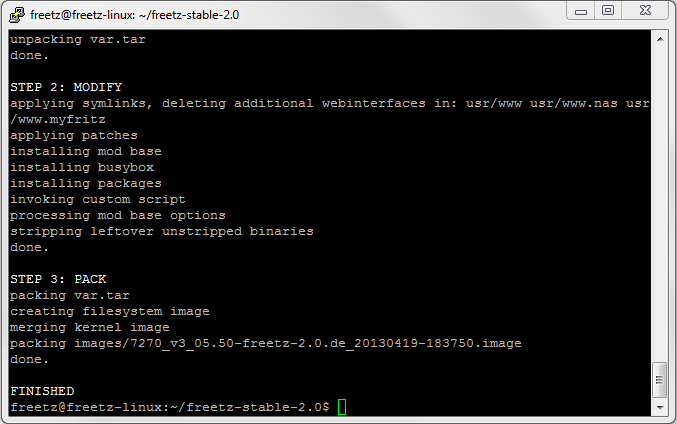
Now copy the image to your computer.
Shutdown Freetz-Linux⚓︎
Shut down the Ubuntu/Freetz-Linux VM with:
Confirm the command with the administrator password freetz.
The Flashing Process⚓︎
Once the image is on your computer, prepare for the possibility that the
box may not work correctly after flashing. Take these precautions:
- Download the recovery image for your box. You can find
Recover.exe
on AVM's FTP site. - Upgrade your router to the newest official firmware.
- Keep your access data ready.
- Back up your FRITZ!Box settings.
- Make sure you have set a password in the AVM web interface. Even a
simple0000is sufficient; without a password, firmware upload may
not be possible.
Go to the FRITZ!Box web interface, select the Freetz image for the
firmware update, and start the process. A warning will inform you that
the firmware you are about to upload is not officially approved; confirm
it. The router will restart after about one or two minutes. The AVM web
interface should become reachable again, and you can log in to the box.
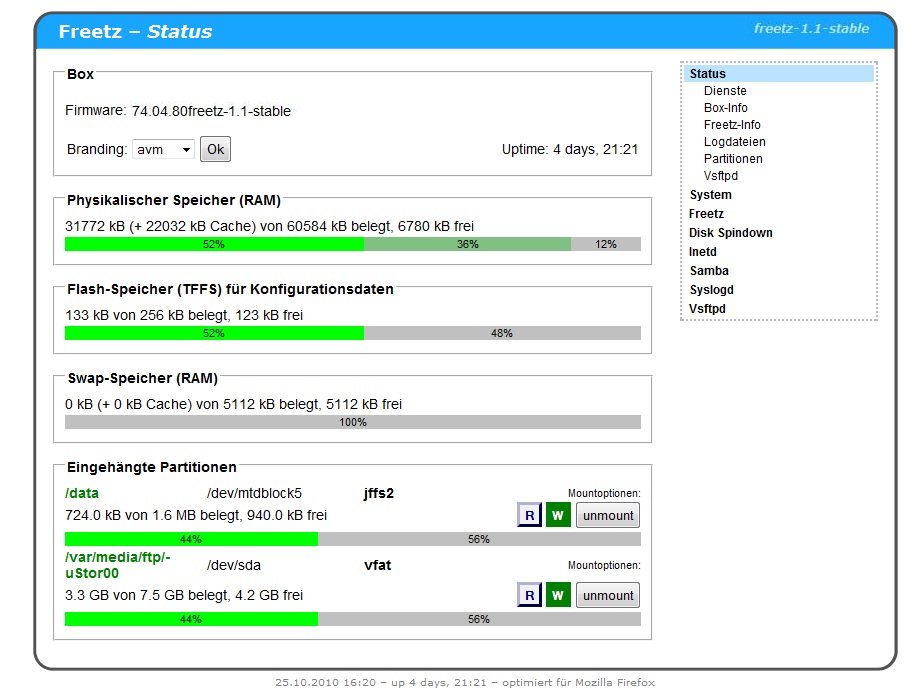
You now have an additional Freetz interface at
http://fritz.box:81. The first login uses
admin and freetz; change that password immediately.
Congratulations: your first Freetz image is now on your box.
Validate After Flashing⚓︎
Check these basics before adding more packages:
- The device boots normally.
- The AVM web interface is reachable.
- Internet access works.
- Telephony works.
- The Freetz web interface is available.
Only after this baseline is stable should you add more packages.
Common Beginner Mistakes⚓︎
- Enabling too many packages at once.
- Skipping backups and recovery preparation.
- Using unsupported firmware/device combinations.
- Debugging multiple simultaneous changes.
If Something Goes Wrong⚓︎
- Stay calm and recover to stock firmware if required.
- Return to a minimal known-good Freetz configuration.
- Reintroduce changes one by one.
- Ask the community with exact build and configuration details.
Community and Support⚓︎
Community support is available through Freetz and IP-Phone forum
channels. Provide clear context when asking for help:
- Device model
- Firmware version
- Selected packages and patches
- Build errors or runtime symptoms