Freetz Linux⚓︎
Freetz Linux under VirtualBox⚓︎
- Start VirtualBox, choose File -> Import Appliance, and follow the
dialog. Select the Freetz Linux file you just downloaded as the image. - The import takes a moment. Afterwards, use Change to check the
settings.
Freetz Linux under VMware⚓︎
Depending on which VMware product should run Freetz Linux later, I tried
two approaches. These tools are helpful, though not all of them are
needed for both approaches:
- Freetz-Linux
itself - Virtualbox
- VMWare OVF
Tool - Notepad++ as a good editor
- VMware vCenter Converter
standalone
Freetz Linux under VMware ESXi V4.1 Hypervisor (also works with vSphere Hypervisor 5.5)⚓︎
- Start VirtualBox, choose File -> Import Appliance, and follow the dialog.
- The import takes a moment. Afterwards, choose File -> Export Appliance
and follow the dialog.\
Select storage location and filename, changing the file extension from
*.ovato*.ovf.
The OVF version should be set to 1.0. - Load the generated
*.ovffile into a text editor.
change to
and save the*.ovffile.\
vmx-07denotes VM version 7, for example ESXi V4.1. Older VM versions
should work withvmx-04.- Start the vSphere Client and connect to the ESXi hypervisor.
- Choose File -> Deploy OVF Template. Follow the dialog, make the desired
settings, and wait for the import to finish.
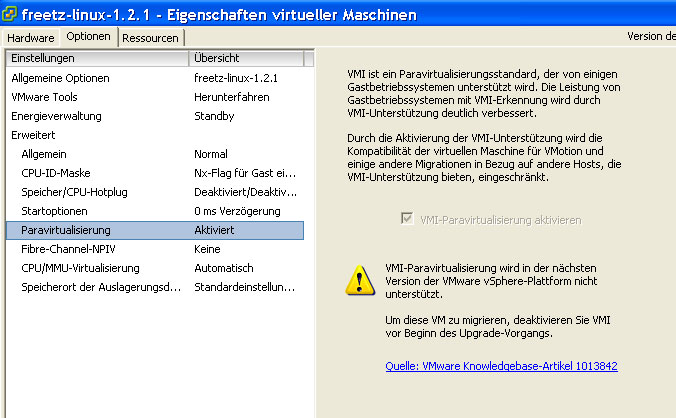
7a. Start the virtual machine.
7b. If you get a segmentation fault during system startup, shut down the
VM, enable paravirtualization in the VM settings, and start the VM again.
Freetz Linux under VMware Player V2.5⚓︎
- Start VirtualBox, choose File -> Import Appliance, and follow the dialog.
- The import takes a moment. Afterwards, choose File -> Export Appliance
and follow the dialog.\
Select storage location and filename, changing the file extension from
*.ovato*.ovf. - Load the generated
*.ovffile into a text editor.
change to
and save the*.ovffile.\
vmx-07denotes VM version 7, for example ESXi V4.1. Older VM versions
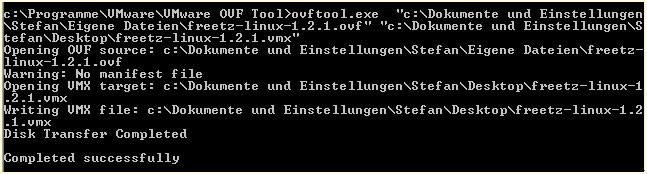
should work withvmx-04.- Open a command prompt: Windows -> Start -> Run ->
cmd-> Enter. - Change into the OVFTool directory and convert the VM like this:\
ovftool [*.ovf file] [*.vmx file] - Start VMware Player and load the VM.
The *.vmx file created in scenario 2 can also be used on the ESXi
hypervisor and manually added to the inventory through the datastore
browser. Keep the segmentation fault note above in mind. Creating the
*.vmx and *.vmdk files may be useful anyway so you can store the
converted Freetz Linux.
For information: I only had to use the VMware vCenter Converter
standalone listed above once on an ESXi hypervisor because neither of the
two described methods worked.
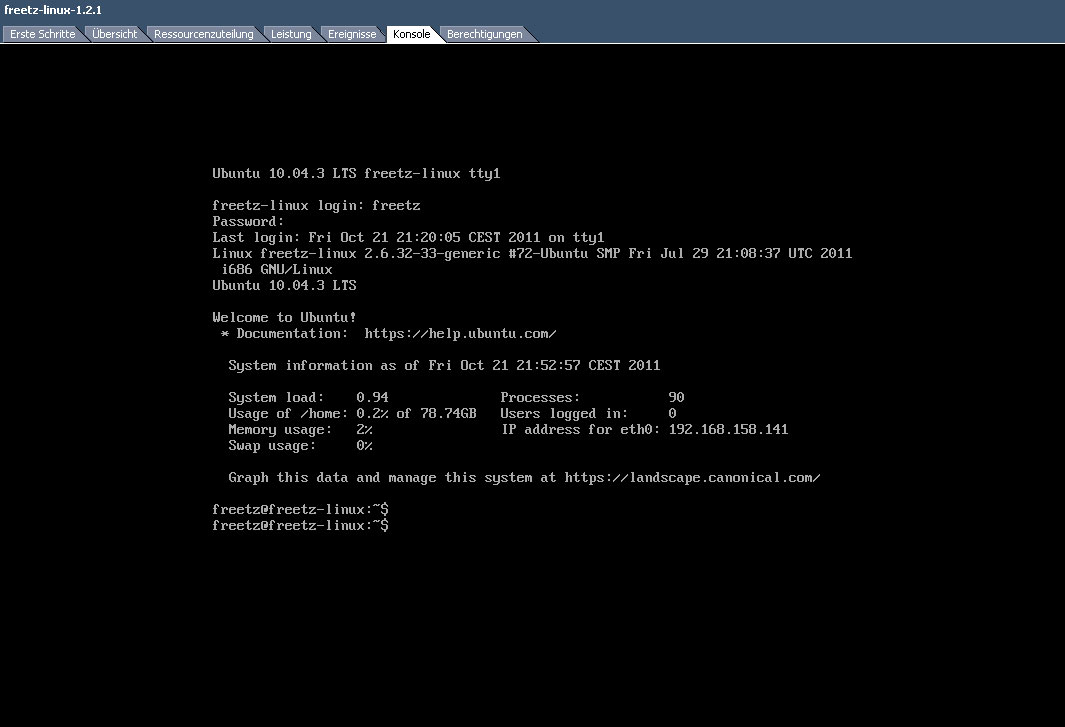
Here are some screenshots matching the notes above:

Freetz Linux under Virtual PC⚓︎
I tested this under Windows XP x86 with Virtual PC 2007 and under Windows
7 x86_64 with Windows Virtual PC. These tools are helpful:
- Freetz-Linux itself
- Virtualbox
- Virtual PC 2007 for Windows XP
- Windows Virtual PC for Windows 7; XP mode is not required
1a. Start VirtualBox, choose File -> Import Appliance, and follow the
dialog. The import takes a moment.
1b. Exit VirtualBox.\
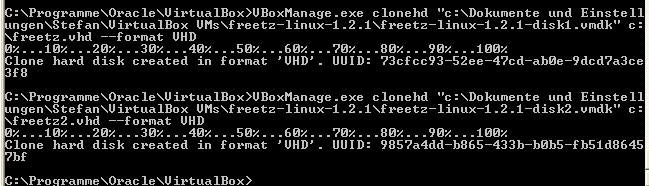
2. Run these commands to convert the two hard disks:\
VBoxManage.exe clonehd freetz-linux-1.2.1-disk1.vmdk freetz.vhd --format VHD\
VBoxManage.exe clonehd freetz-linux-1.2.1-disk2.vmdk freetz2.vhd --format VHD\
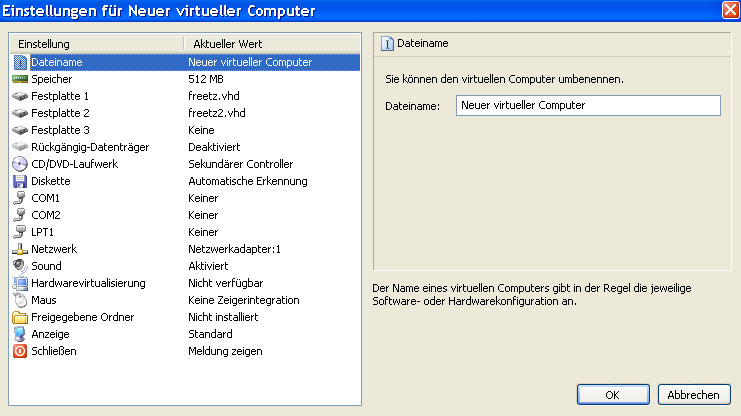
3a. Start Virtual PC and create a new virtual computer; see the screenshot
for details.
3b. Start the new virtual PC.
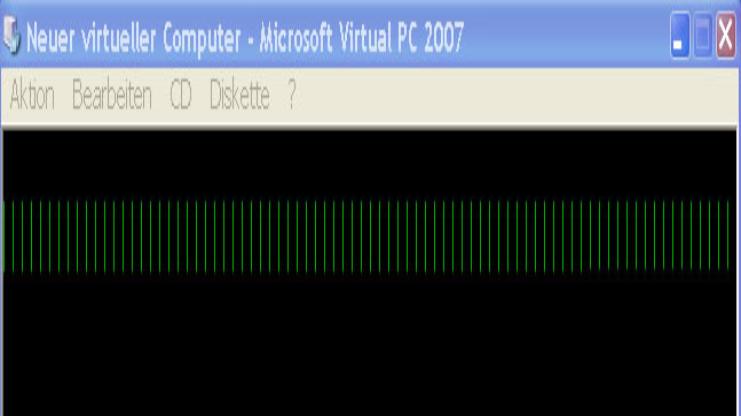
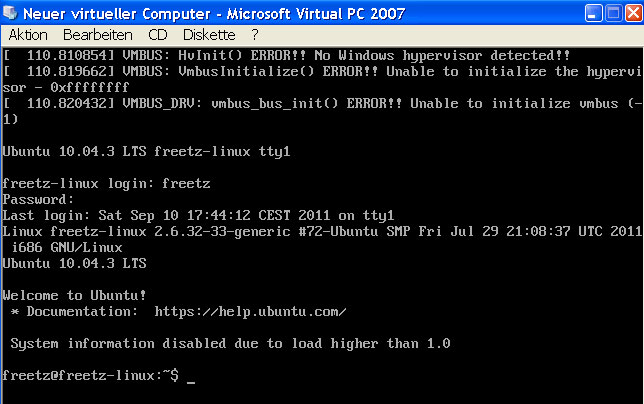
4. Most likely, the graphics resolution and similar settings are not
detected correctly; see the screenshot. If so, continue with step 5.
5. Restart the virtual machine with the key combination [Alt Gr]+[Del].\
6. While the Grub boot manager is active, press [Esc] to reach the menu.
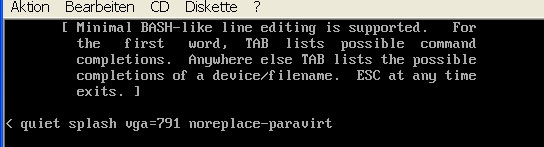
7a. Press [e] on the first menu entry. Press [e] again on the kernel boot
parameters. Add these boot options: vga=791 noreplace-paravirt.\
7b. Press [Return].\
7c. Press [b] to start Ubuntu.\
8. The usual Ubuntu screen should appear and Freetz Linux should start up
to the console login.\
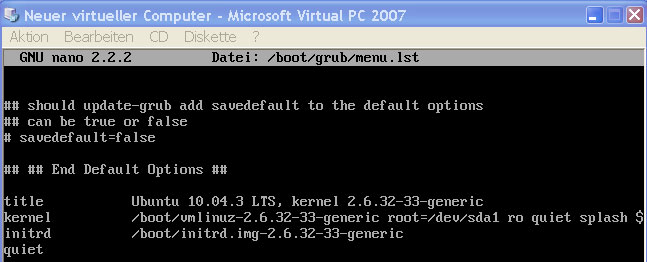
9. Make the manual entries persistent in the Grub configuration. Run:\
sudo nano /boot/grub/menu.lst\
Near the bottom of the file, add the options used during the first boot.\
Save with [Ctrl]+[O] and exit with [Ctrl]+[X].\
10. Restart the virtual machine to check whether the values were saved.
Here are some screenshots matching the notes above: