External⚓︎
Created from this IPPF thread:
http://www.ip-phone-forum.de/showthread.php?t=160920
"External" helps with the flash-space problem on FRITZ!Boxes. It allows
installing an image larger than the flash would normally permit. Packages,
libraries, and user-defined files are "externalized" or moved out of the
image. On boxes with USB host support, a connected USB stick is a good
place for them. On older boxes, the Downloader CGI can load the files into
RAM from an FTP or HTTP server. Alternatively, the files can be mounted
through autofs. External can avoid the message Filesystem image too big.
The path to the external files can be configured in the web interface
under Freetz -> Settings -> external.
No other files may be present there, because that could lead to
Fehlern
.
Only packages selected for installation can be externalized.
Configuration⚓︎
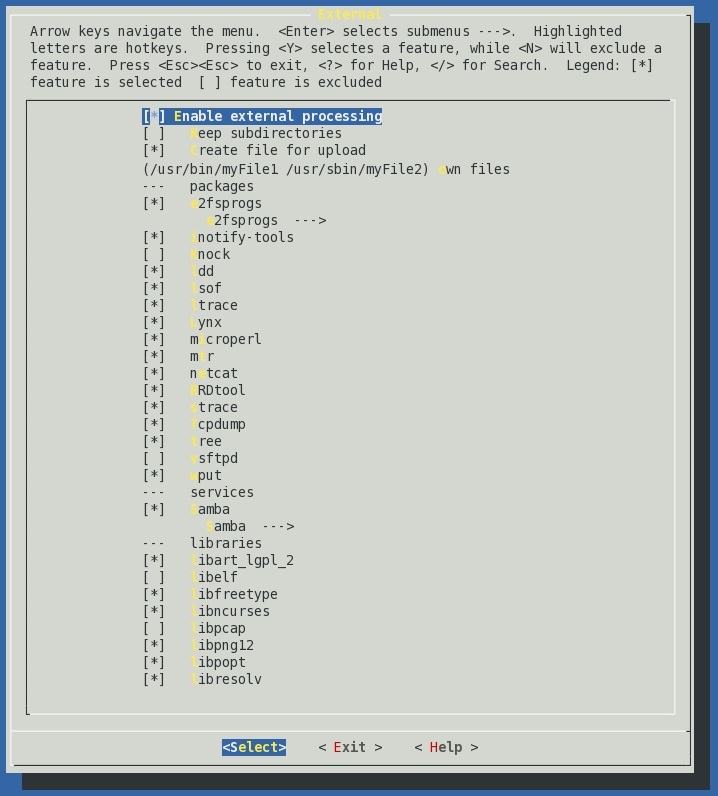
Available in menuconfig under "Advanced Options" -> "External".
Prepare files for Downloader⚓︎
This option is visible only if the Downloader CGI was selected for
installation. It creates packages during the make process for later
download. See the Downloader CGI for more details.
Keep subdirectories⚓︎
The directory structure of the externalized files is preserved. This has
the advantage that files with the same name in different locations in the
image can be externalized. The disadvantage is that manually copying the
files to the box is more cumbersome.
Create file for upload⚓︎
All externalized files are packed into one file that can be uploaded to
the box through the Freetz web interface. The file is found in the
images directory and has the same name as the created image, but with
the extension .external.
own files⚓︎
Additional files to externalize can be specified here. Enter the path on
the FRITZ!Box. If there is more than one file, separate them with spaces.
Selection⚓︎
packages⚓︎
Various "binary-only" packages can be selected for externalization here.
They should all be unproblematic.
services⚓︎
Various automatically starting packages can be selected for
externalization here.
They are loaded only when the USB stick is available and the option to
automatically start externalized services is enabled in the web interface.
libraries⚓︎
Various libraries can be selected for externalization here.
Note that programs linked against these libraries can start only after the
file has been loaded on the box. Check dependencies first.
Installation⚓︎
Files selected for externalization must be made available on the box.
When using a USB stick, select "Create file for upload" during
configuration. The generated file can be copied to the box through the
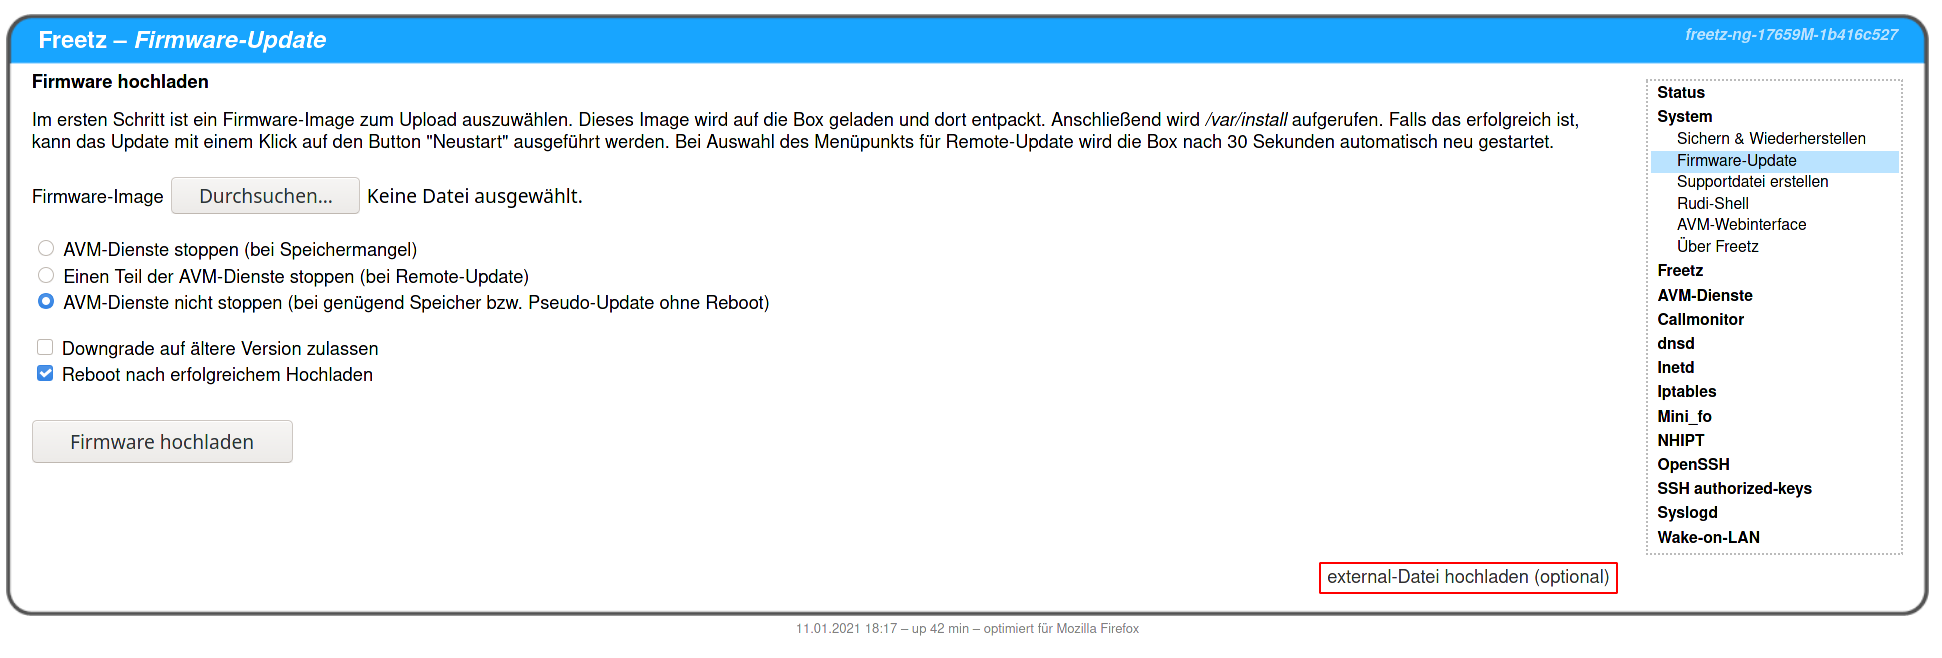
installed Freetz web interface: System -> Firmware update -> "upload
external file".
When using an FTP/HTTP server or an NFS server, make sure yourself that
the box can access the files.
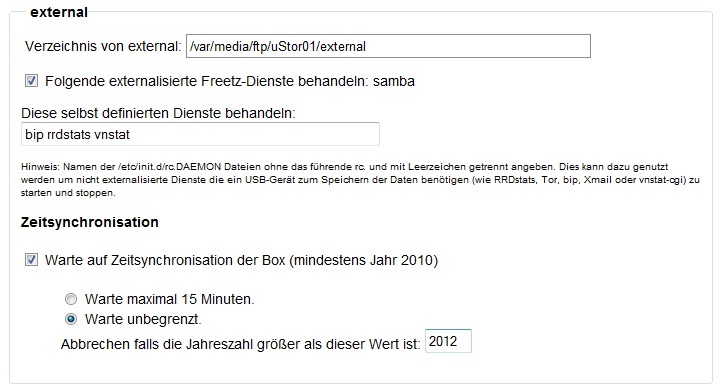
Automatically Start/Stop Services⚓︎
This can be configured in the web interface under Settings. Services
entered here appear in the web interface only while the storage medium
with the externalized files is available. The other options should be
self-explanatory. Here is a screenshot:
Under Log files, the web interface shows /var/log/external.log. In
the "Waiting" lines, each dot means one second of waiting. If there are
"thousands" of dots, something is preventing a clean boot, probably a
timer in rc.custom or debug.cfg.
Firmware Build Process and Update⚓︎
The firmware build creates two files: xxx.image, the actual firmware
image, and xxx.external, the files to be externalized.
Both files are found in the images folder. The external file is a
packed tar file that is automatically unpacked into the target directory
when uploaded through the Freetz web interface. It is recommended to
upload the external file first, through Freetz WebIF -> System -> Firmware
update, and only then upload the firmware. This way the external packages
for the updated firmware are already available.