How Do I Build My First Trunk?⚓︎
Description for a Trunk Image Including Samba and VSFTP⚓︎
These instructions are written for everyone who wants to modify their
FRITZ!Box with a FREETZ trunk, the developer version, for the first time.
Build a Trunk Image⚓︎
The procedure for building a trunk image is identical to the steps in the
newbie tutorial up to check out Freetz sources. Therefore, this guide
starts at that point. If you are unsure, go through the tutorial again up
to "check out Freetz sources".
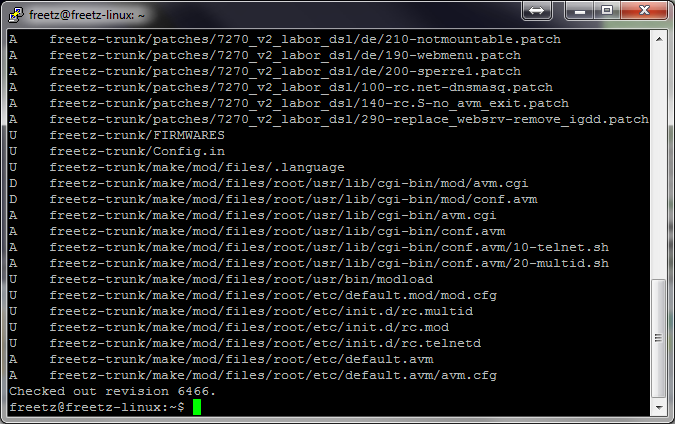
The checkout command now looks a little different. Enter the following
command:
If this does not start, the network connection may not be working. In that
case, a ping 192.168.XXX.1 from the console should show whether the
network connection works. The Freetz sources should now be downloaded.
Afterwards, change into the Freetz directory with cd freetz-trunk and
enter make menuconfig.
After this input, you should see the following screen:
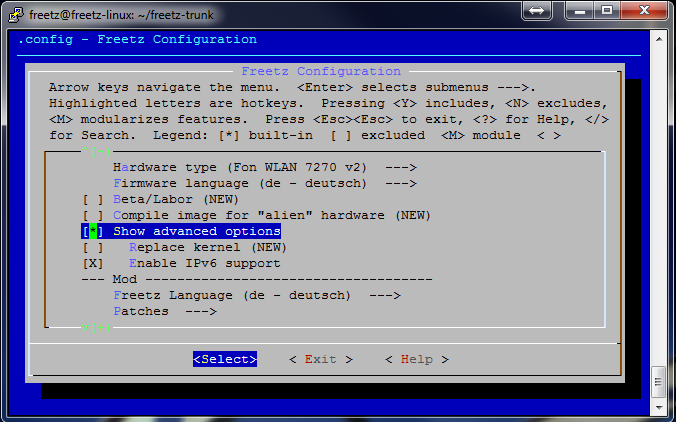
This is again the configuration interface of the Freetz build system.
Select the respective router and desired packages there. For this how-to,
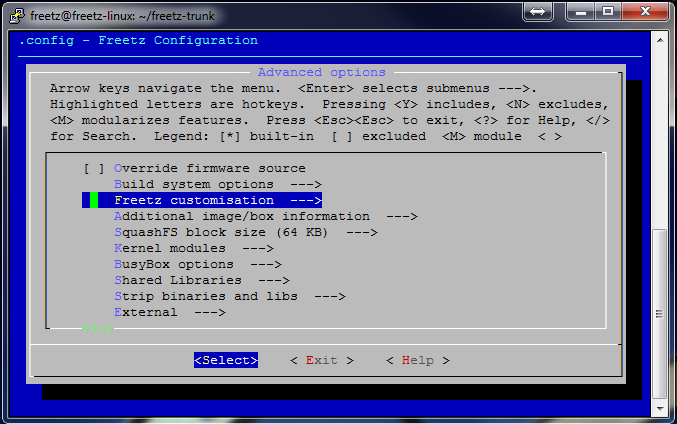
we use the 7270_v2 as an example. First, activate the advanced view on the
first page, Level of user competence -> Advanced. Then select the
following patches for a Freetz image:\
Under Firmware language:
- Select whether you want to create German or English firmware.
Warning: the selection must match the existing box.
Under Other patches:
- FREETZMOUNT
- Automount Filesystems
- NTFS
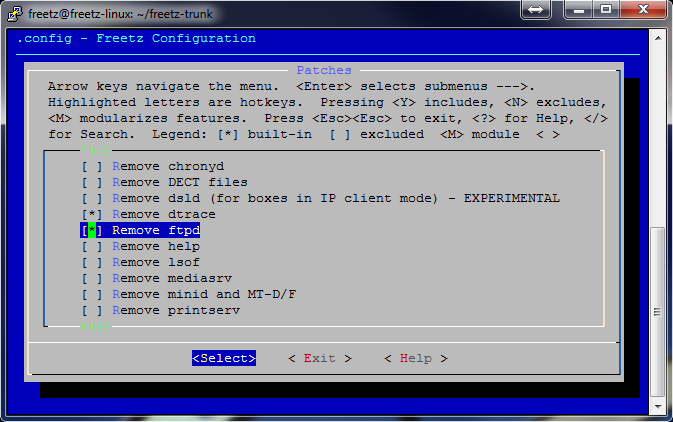
Under Removal patches:
- Remove ftpd (NEW); one FTP program on the box is enough.
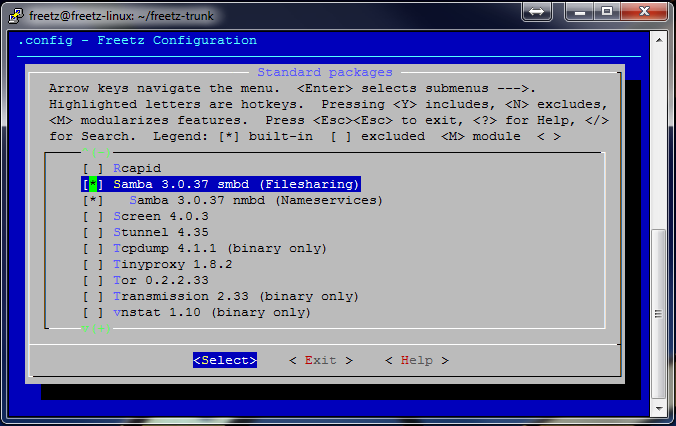
Under Packages/Standard packages:
- Samba suite, a server that allows Windows access to USB media on
the FRITZ!Box. The check marks for the two Samba sub-itemssmbdand
nmbdmust be set. - VSFTP, FTP server. Do not set any further check marks for its
sub-items.
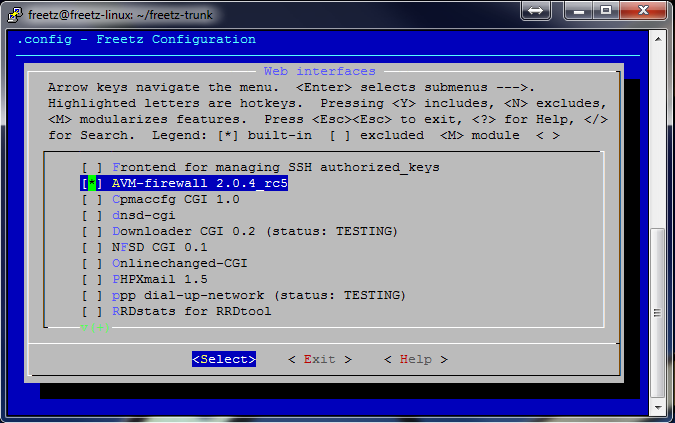
Under Packages/Web interfaces:
- AVM-firewall, a web interface for administering the integrated
firewall that AVM withholds from the user. - spindown-cgi 0.2
- Syslogd CGI 0.2.3
Under Web Interface:
- Favicons (none) ---> select a favicon. This is the image displayed
as a bookmark in the browser.

Further packages and patches, including their descriptions, can be found
on the package page.
After selecting all packages and patches, exit the configuration and enter
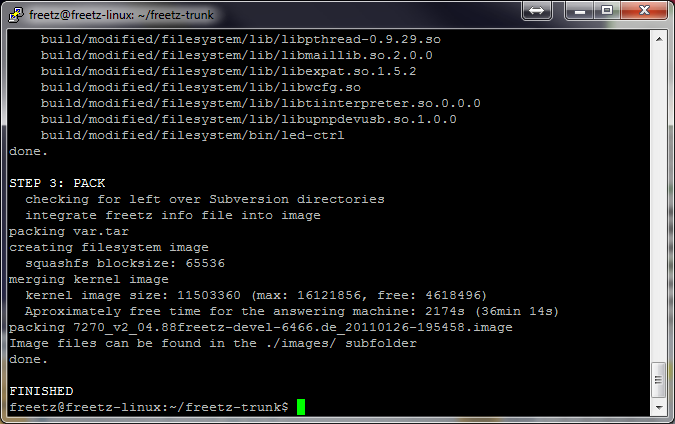
make on the shell command line. You should now see a screen like this:
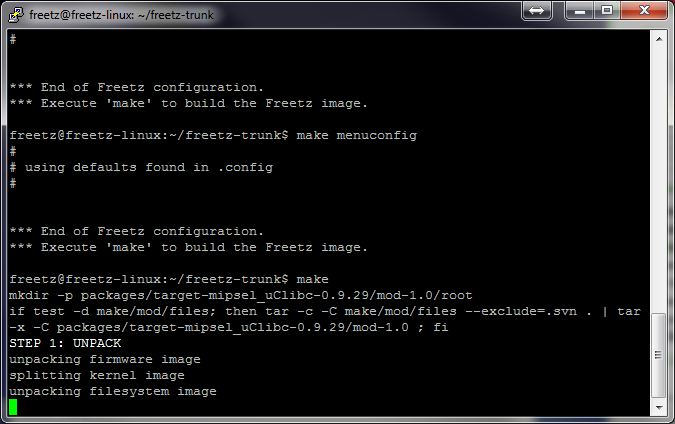
The build process starts again. The flow is identical to the first image.
The created image is again placed in the images subdirectory of the
Freetz directory.
The final message looks like this:
The steps copy image to the PC and the flashing process are again
identical to the newbie tutorial.
Configure Samba⚓︎
Samba must first be configured. Go to Packages/Samba. Set startup type
to automatic and assign a NetBIOS name. The check mark at
Preferred master is important because it replaces the FRITZ!Box's
standard Samba server.

The rest can be left as is; click Samba shares.
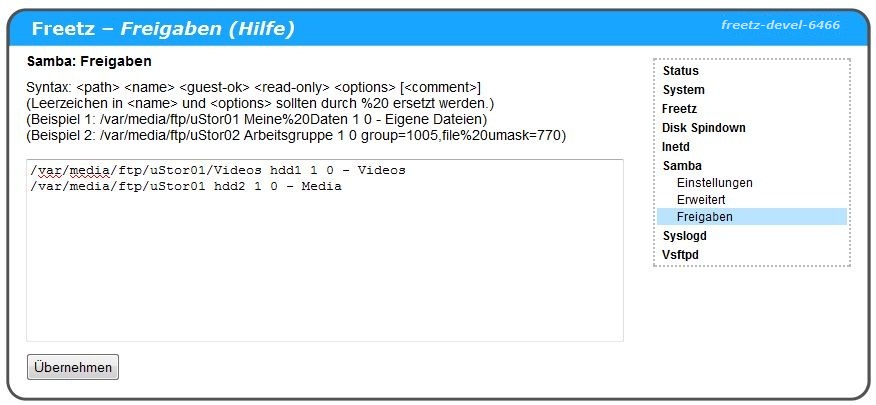
Here, as an example, we have created two shares on the USB HDD of the
FRITZ!Box: one for guest and the second for family. A short
description of the parameters using the first share:
- /var/media/ftp/uStor01 is the internal path to the hard disk.\
- /Videos is the shared directory.\
- hdd1 is the share name shown in the Windows network environment.
- 1 allows guest access; no username and password required.\
- 0 enables read-write access.\
- - reason for the dash: unknown; it must be present, explanation to
follow.\ - Videos comment.
Example:
Because we assigned fritz as the NetBIOS name, Windows accesses the
share as fritz\hdd1. Now start the Samba server under Services, and
it should work.
Configure FTP Shares (Freetz Trunk)⚓︎
Warning: this description is based on a trunk image. FTP shares for
Freetz 1.1.x images will be explained later.
First, a folder structure must be created on the USB disk. Simply format
your USB stick or hard disk as FAT32. NTFS would also work, but is not
described in more detail here. Your disk should then look like this:
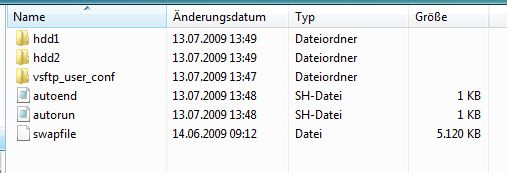
If that is the case, connect the stick to your FRITZ!Box. In the rest of
this description, we assume a stick. Now, if not already done while
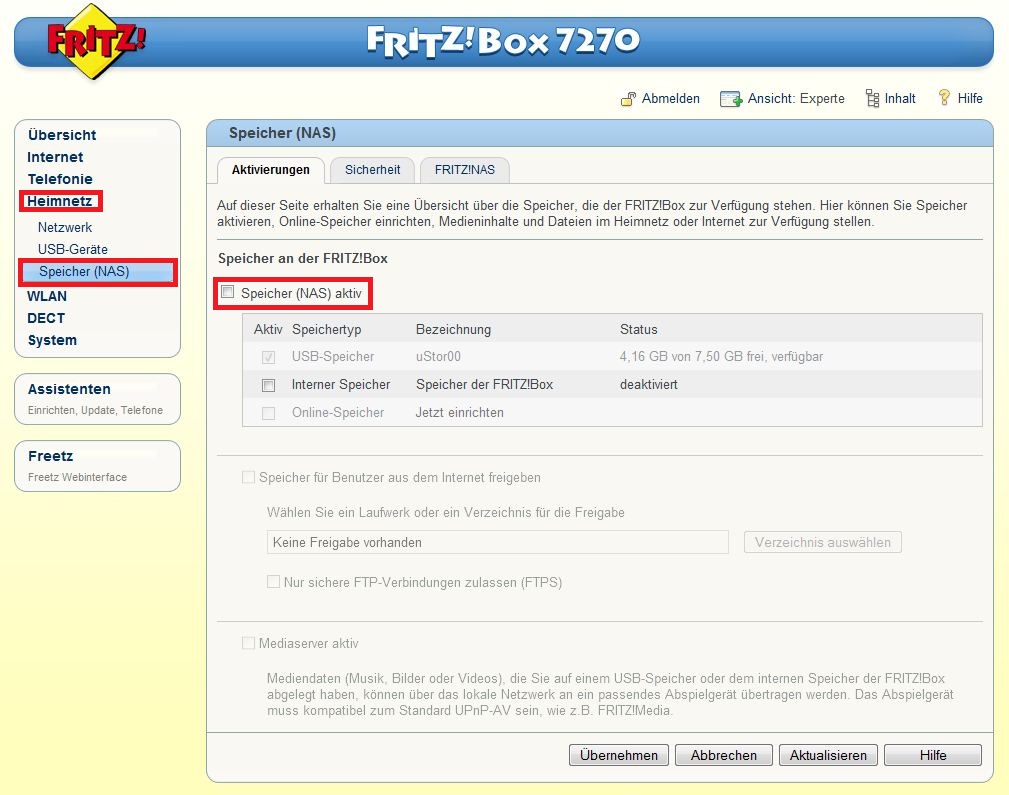
configuring Samba, disable AVM's FTP solutions:
- fritz.box → Settings → Advanced settings → USB devices →
USB storage/storage (NAS) - Enable USB storage FTP access -> remove check mark
- Enable USB network storage -> remove check mark
It should now look like this:
Now switch to the Freetz interface:
http://fritz.box:81/ und
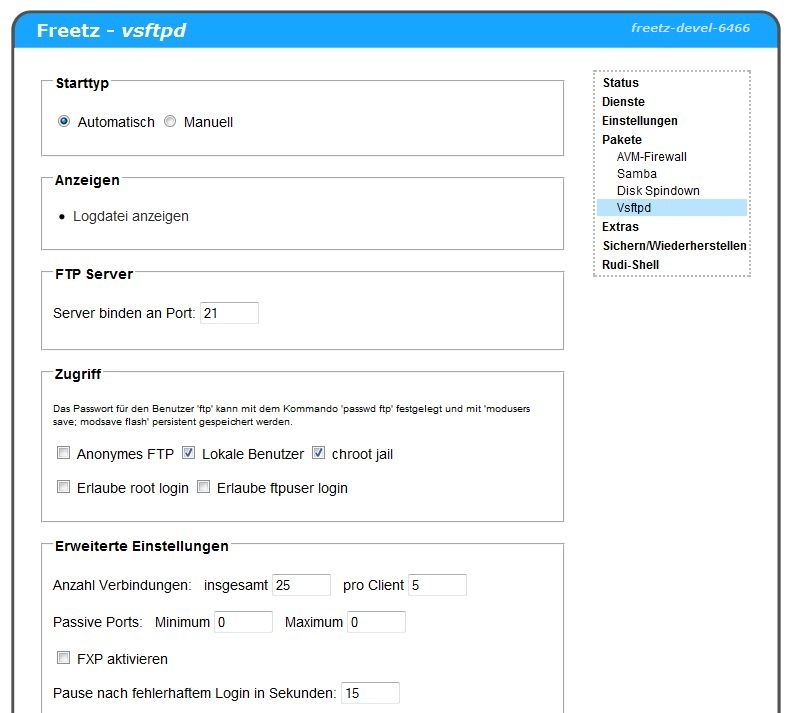
enter the following under Services -> vsftp:
- Startup type: Automatic
- Access: set check marks for Local users and chroot jail;
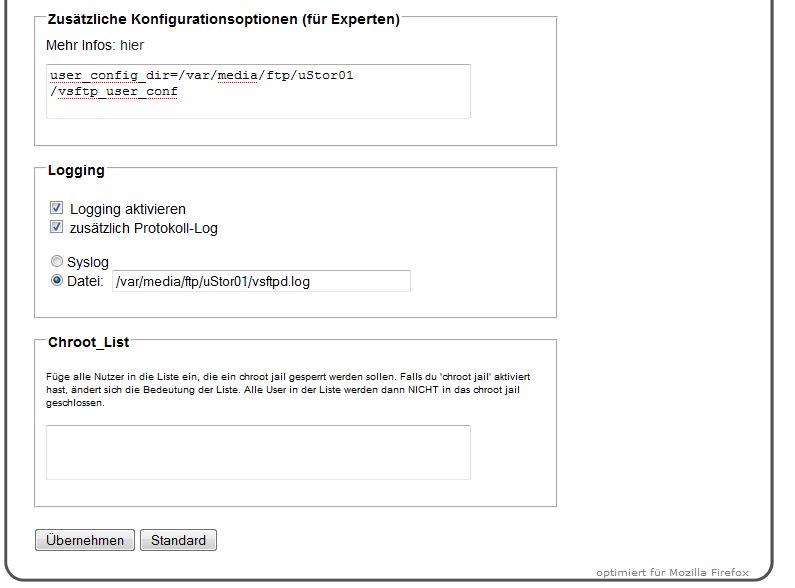
remove all other check marks. - Additional configuration options for experts:
user_config_dir=/var/media/ftp/uStor01/vsftp_user_conf - Logging: /var/media/ftp/uStor01/vsftpd.log; can be enabled but is
not required.
Apply all entries by pressing Apply. It should then look like this:
Now turn to the AVM firewall:
- Go to Packages -> AVM-Firewall and the Forwarding item. The FTP port
still has to be opened here; see the screenshots.
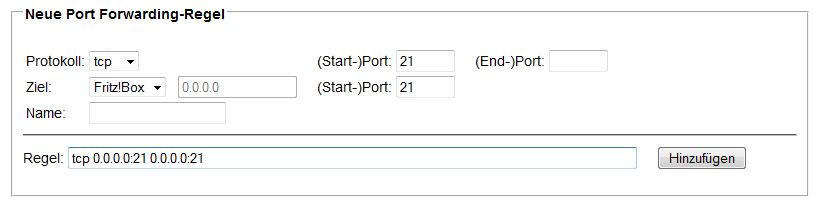
After entering the numbers, see above, simply press Add and the result
should look as follows:
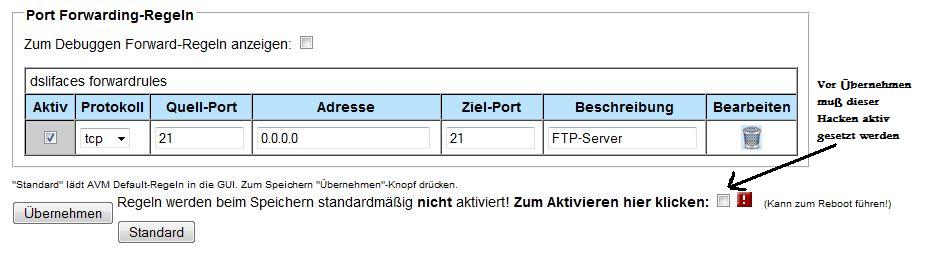
To finally save this setting, simply set the check mark, the blinking box,
and wait for the box to reboot. After the box has started again, open the
Services tab in the Freetz web interface once more and activate the
telnetd service. It must be started to configure the FTP users in the
next step. It is not recommended to set this service to automatic; start
it manually when needed.
For now, leave the web interface and move to the FRITZ!Box command line.
For this, Windows users first need
PuTTY, which must be downloaded and
installed on the PC. This step is needed only for Windows users. Linux
users can start a Telnet session as usual. PuTTY can be downloaded as
freeware here: Download and is configured as
follows:
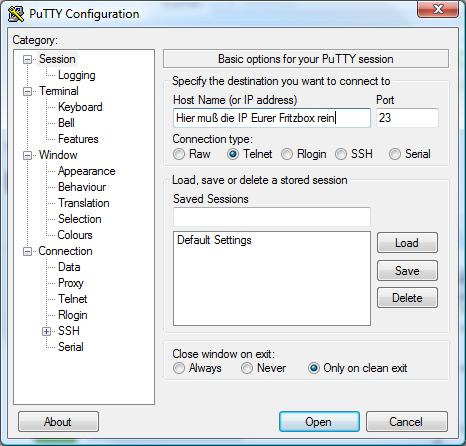
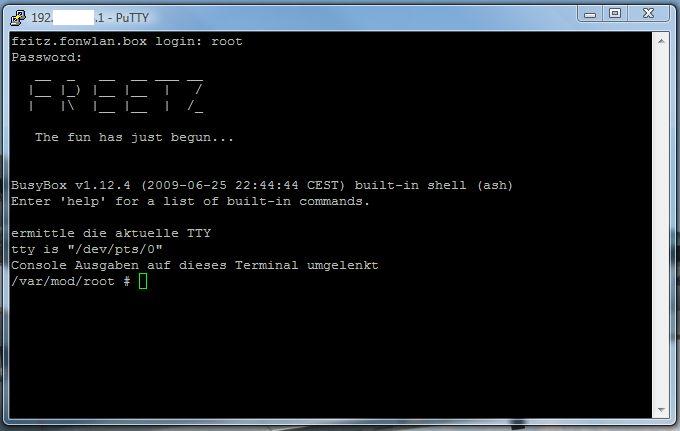
After pressing Open and entering login: root and password:
freetz, you should see this screen:
Create Users⚓︎
The command is structured like this:
adduser -h '''directory''' '''username'''
Directory: folder on the stick that should be assigned to the user,
for example /var/media/ftp/uStor01/
Username: name of the user
When creating the user, the password is requested immediately. It must be
entered twice; nothing is shown on screen, not even asterisks. We now want
to create a user Paul and a user Mary, who should receive FTP
access to the folders hdd1 for Paul and hdd2 for Mary; see Samba.
Additionally, a user Guest with read-only rights to folder hdd1 is
created. Enter the following commands in PuTTY; pay attention to upper and
lower case:
    /var/mod/root # adduser -h /var/media/ftp/uStor01/hdd1 paul
    adduser: /var/media/ftp/uStor01/hdd1: Operation not permitted
    Changing password for paul
    New password:
    Bad password: too short
    Retype password:
    Password for paul changed by root
The message Operation not permitted appears when the filesystem is FAT
or NTFS. Now do the same again for Mary and guest:
To change a password, use the command passwdusername. You are
again asked twice for the new password. A user can be deleted with
deluserusername. In every case, changes must be saved again with
modsave all. The file can be displayed with cat /var/tmp/passwd.
Displaying and changing is also possible through the Freetz Rudi shell.
This is available only when the security level is set to 0. If everything
went correctly, passwd should contain the following:
    root:x:0:0:root:/mod/root:/bin/sh
    ftp:x:2:1:FTP account:/home/ftp:/bin/sh
    ftpuser:x:1:1:ftp user:/var/media/ftp:/bin/sh
    paul:x:1000:1000:Linux User,,,:/var/media/ftp/uStor01/hdd1:/bin/sh
    mary:x:1001:1001:Linux User,,,:/var/media/ftp/uStor01/hdd2:/bin/sh
    gast:x:1002:1002:Linux User,,,:/var/media/ftp/uStor01/hdd1:/bin/sh
Now log out from the PuTTY console with this command:
Assign Rights for FTP Users⚓︎
Whether a new FTP user should receive write rights or read-only access
is controlled as follows:\
Each user receives a file with their filename in the folder
/var/media/ftp/uStor01/vsftp_user_conf/, which determines whether
the user has write rights or not.
File content:
write_enable=yes: user has write rights; see Paul and Mary.\
write_enable=no: user has no write rights; see guest.
These user files also make it possible to forbid individual FTP commands
(list) for users.
Add the following line to the file and remove the commands the user is not
allowed to execute:
cmds_allowed=ABOR,ACCT,ALLO,APPE,AUTH,CDUP,CWD,DELE,EPRT,EPSV,FEAT,HELP,LIST,MDTM,MKD,MODE,NLST,NOOP,OPTS,PASS,PASV,PBSZ,PORT,PROT,PWD,QUIT,REIN,REST,RETR,RMD,RNFR,RNTO,SITE,SMNT,STAT,STOR,STOU,STRU,SYST,TYPE,USER
Example: Mary may copy files to FTP and create directories, but may
not delete them again. Therefore, the following must be in the file:
cmds_allowed=ABOR,ACCT,ALLO,APPE,AUTH,CDUP,CWD,EPRT,EPSV,FEAT,HELP,LIST,MDTM,MKD,MODE,NLST,NOOP,OPTS,PASS,PASV,PBSZ,PORT,PROT,PWD,QUIT,REIN,REST,RETR,RNFR,RNTO,SITE,SMNT,STAT,STOR,STOU,STRU,SYST,TYPE,USER
DELE (Delete file), RMD (Remove a directory) were removed from
the string above.
\
\
If something still does not work, simply restart the router again.
Build an Image for a Speedport⚓︎
Unfortunately, Speedports cannot be flashed through the AVM web interface
because of a software lock. Use the Freetz tools recover-eva or
push_firmware, or GUI programs from the forum such as
ruKernelTool. It works
very well and is easy to use.
Which Speedports Can Be Modified with Freetz?⚓︎
- W501V
- W701V
- W900V
- W920V
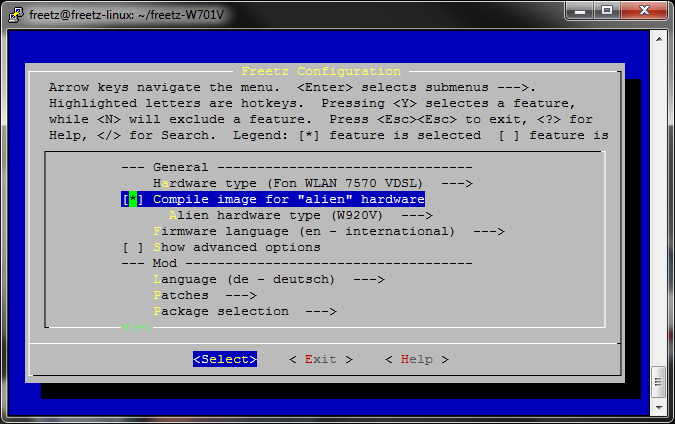
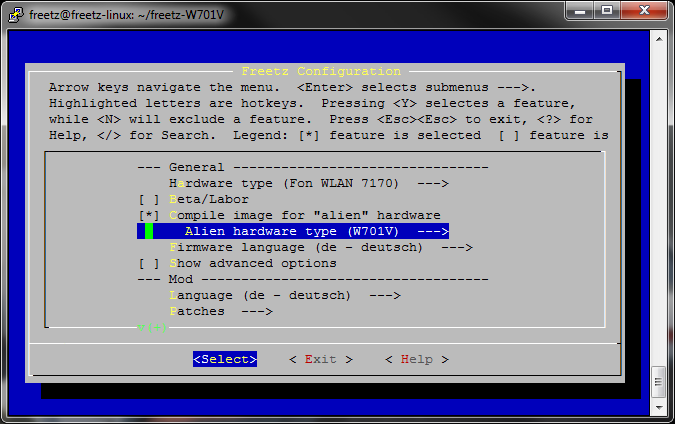
Converting a W701V⚓︎
- Start Freetz Linux as described above.
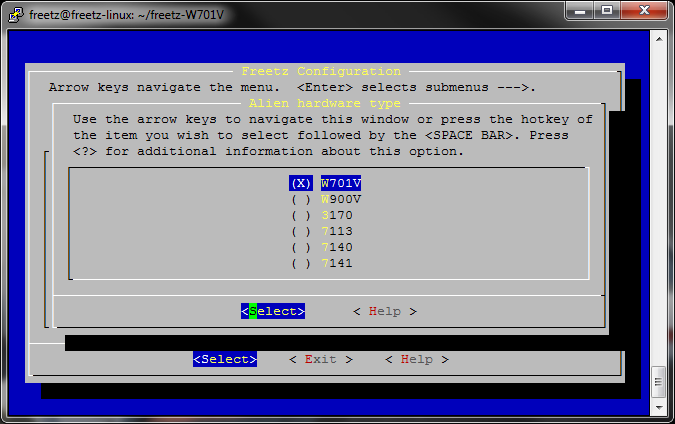
- Work through all steps as described in the how-to,
but select 7170 as box type and set W701V under Alien hardware type.
-
Samba and VSFTP are useful only on a W920V (7570), because it has a USB
port. All other steps in the how-to, however, also
apply to a Speedport. -
The created image should be loadable into the box as a normal firmware
update. If the box refuses the update, which happened with my W701V, the
only remaining way is through
ruKernelTool. In that
case, however, all access data and settings are lost. The box effectively
performs a factory reset.
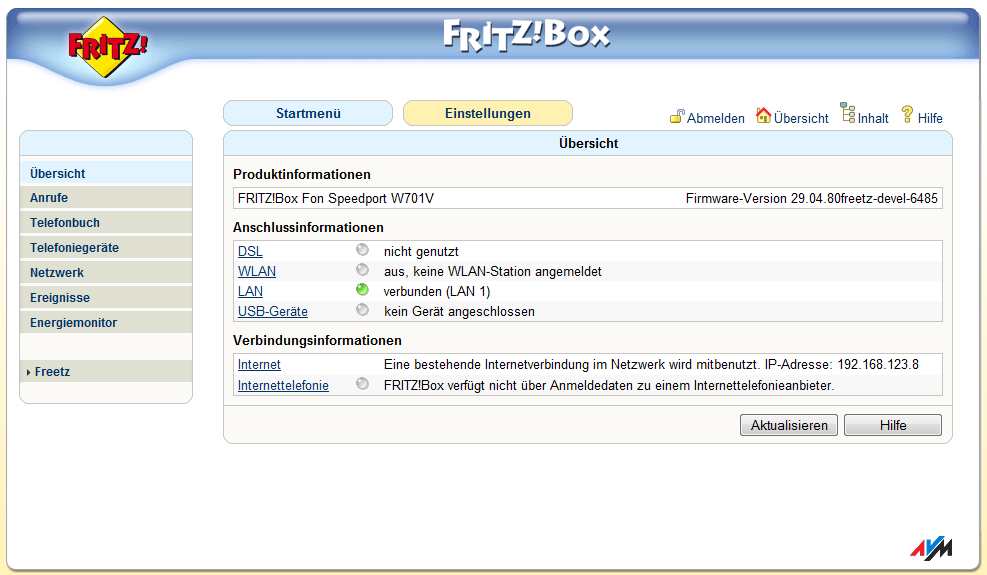
Result:
Converting a W501V⚓︎
The W501V can be selected directly as the box type.
Converting a W920V⚓︎
Box type: 7570 VDSL\
Alien type: W920V